This blog contains affiliate links. As an affiliate, I earn a commission from qualifying purchases at no additional cost to you.
When I first started planning weddings, I noticed something: most couples jump straight into asking how much a wedding will cost and calling vendors, and then they get completely overwhelmed. Chances are, you have been thinking about what you may want and not want for your wedding for a LONG time. Now it is time to re-evaluate everything and get down to actually planning your big day! In this ultimate wedding planning guide, I explain everything you need to know.
If you have not heard of Miss. to Mrs. click on the image to go to their website. It is full of great ideas for special gifts for the bride!

But here’s the truth: wedding planning doesn’t have to be hard or stressful. If you just start at the beginning and take it step by step, it can actually be fun, yes. This is an important time in your lives, and you are planning an important, life-altering event. It will join the two of you and your families. You will learn a lot about each other, your families, and your priorities.
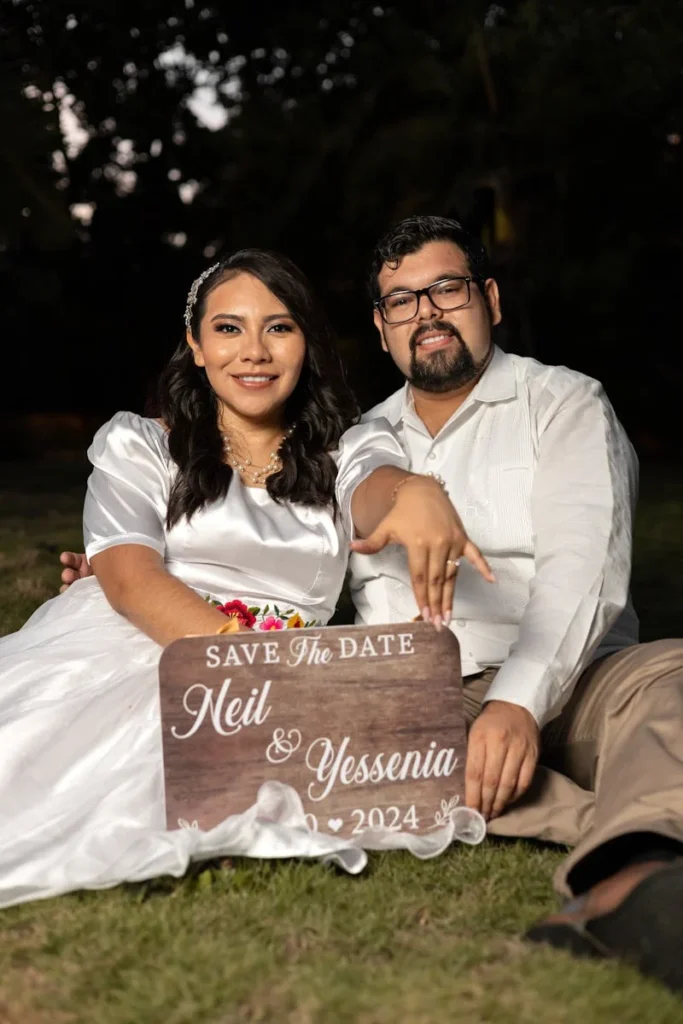
This blog lays out the 12 Wedding Planning Steps.
In This Guide
In this wedding planning guide, I’ll walk you through every part of the wedding planning process, giving you everything you need to know. From setting a budget to picking the perfect playlist, I’ll share what works, what matters, and what you can skip. It’s all laid out in the order you should tackle it, so you don’t get ahead of yourself or feel buried in decisions.
Let’s make planning your big day simple, stress-free, and even fun. Ready? Let’s do this!
Table of Contents
- Start Here: What Comes First?
- Building a Budget You Can Stick To
- Picking a Wedding Style That Feels Like You
- Setting the Date and Finding the Right Venue
- The Wedding Planning Timeline (Month-by-Month)
- Booking the Big Vendors
- The Fun Stuff: Food, Flowers, Fashion & Music
- All the Little Details (That Add Up to Big Impact)
- What to Do the Week Before
- Wedding Day Tips (So You Can Actually Enjoy It)
- After the “I Do”: What’s Next?
- Free Printable: My Wedding Planning Checklist

What Comes First When Wedding Planning?
Okay, you’re engaged—yay! That part was easy (and hopefully magical). Now what?
Before you jump into dress shopping or cake tasting, let’s slow down and start at the very beginning. Trust me, this will save you so much time and stress later.
Here’s what you should do first:
Talk About Planning Your Wedding
Sit down with your partner and talk about the kind of wedding you both want. Not just the size or the style, but how you want it to feel. Ask each other:
- Do we want something big or small?
- Indoors or outdoors?
- Formal or super relaxed?
- What do we not want?
It’s okay if you’re not on the same page right at first. Just talk it out and find a middle ground. This is your first “team project” as an engaged couple. Don’t worry if you are all over the place and considering all options. The time to narrow things down will come; now is the time to think big picture. Create a list of wishes and a list of must-haves. You will be surprised how these may change by the end of the planning period.
Set A Guest Count Estimate For Your Wedding
You don’t need an exact list yet, but knowing roughly how many people you’ll invite helps with everything else, especially picking a venue and setting your budget.
Read this blog on the rules for creating your wedding guest list that no one tells you about.
Create a family list and a friend list for each side.
Think in ranges:
Tiny wedding: under 30 guests
Small: 30–75
Medium: 75–150
Large: 150+
If you decide on a small wedding, this blog on Micro Weddings will be helpful.
Figure Out Who Is Paying For What
This part can be awkward, but it’s important. Talk to anyone who might be helping pay for the wedding (like parents or grandparents) and ask if they’re planning to contribute. Have an honest conversation and write what was discussed and the date. When parents are paying for the wedding (or even a portion of it), they often think (no judgment here) that this gives them the power to make decisions on how this money is spent. Get this all worked out at the beginning.
Once you know what money is available, you can build a realistic budget, and that will guide all the decisions that come next.
Start A Planning Folder Or Notebook
You can use an app, a binder, a Google Doc, whatever works for you. Just pick a place to keep:
- Notes and ideas
- Vendor info
- Budget tracking
- To-do lists
This will become your wedding planning guide. You’ll thank yourself later.
Quick Wins: What You Can Do Right Away
- Create a shared Pinterest board or folder of inspiration
- Pick a wedding hashtag if you’re into that kind of thing
- Look at potential dates (season, month, or a few weekends that work)
Up next, we’ll talk about how to set a wedding budget that actually works, and doesn’t leave you stressed or broke.
Budget
Let’s talk about the money part. Not the most exciting topic, but it’s one of the most important topics
If you skip the budget, you’ll end up stressed, overspending, or having to cut things at the last minute. But if you take 30 minutes to sit down and set one now, the rest of the planning will go way more smoothly.
Step 1: Know Your Total Number
Start by adding up how much money you have to spend. This might include:
- Your own savings
- Contributions from parents or family
- Any money you’ll save between now and the wedding (be conservative on this one)
Let’s say you end up with $20,000 total. That’s your full pie. Every decision you make from here on out will be about how you slice it.
And don’t worry, whatever your number is, you can still have an amazing day.
Step 2: Break It Into Categories
Here’s a basic way to break down a wedding budget. These are just averages, you can adjust based on what matters most to you. Read my blog on setting a budget for your wedding HERE.
| Category | % of Budget |
| Venue & Catering & Cake | 40–50% |
| Photography & Video | 10–15% |
| Attire (Dress, Suit, Etc.) | 5–10% |
| Flowers & Decor | 10% |
| Music/Entertainment | 5–10% |
| Stationery (Invites, etc.) | 2–4% |
| Hair & Makeup | 2–4% |
| Officiant & License, Transportation | 2-5% |
| Extras (Favors, Tips, etc.) | 5–10% |
So if you’ve got $20,000, that might look like:
- $9,000 for venue & food
- $2,000 for a photographer
- $1,500 for clothes
- And so on…
Not everything has to be fancy or expensive, but you just need to be honest about your priorities.
Step 3: Decide What Matters Most
Every couple has different “must-haves.” Think about:
- What’s worth splurging on? (Photos? Food? Live band?)
- What can you skip or DIY? (Favors? Programs?)
- What can you borrow or rent?
There’s no right answer. You might want to have a simple BBQ but an amazing dress, or a luxe ballroom and a Spotify playlist. It’s your day. I can tell you that after 31 years of wedded bliss, we have 2 wedding photos framed in the house and the others packed away in boxes. We looked at our wedding video exactly 1 time. This is to say, some things that seemed very important then, now, really are not.
When is it time to create your gift registry (the FUN part) you will want to go to MyRegistry.com to keep all of your gift registries in one place.
Step 4: Leave Some Wiggle Room
Things always come up. Unexpected fees, last-minute changes, forgotten extras. Try to keep at least 5–10% of your budget free for surprises.
Bonus Tip: Track Everything
Use a spreadsheet or budget app. Write down every quote, payment, and deposit. When you stay organized, you stay in control.
Up Next…
Let’s talk about style! In the next section, we’ll figure out what kind of wedding vibe fits you best, and how to make it feel like you from start to finish.
Picking a Wedding Style That Feels Like You
Now that your budget is set, let’s move on to the fun part: figuring out your wedding style.
I’m not talking about just colors or flowers. I mean the overall vibe. The feeling. The look. The mood. The theme: read my blog on selecting a wedding theme HERE.
Some weddings are fancy and classic. Or chill and outdoorsy. Maybe yours is full of sparkle, or totally simple.
The best weddings feel like the couple. So let’s find your style.
This blog on popular wedding colors will also be helpful.
Start With These Questions
Sit down with your partner and ask:
- What kind of places do we love? (Beach, barn, big city, backyard?)
- What do we wear when we dress up? (Glam, boho, sleek, vintage?)
- What kind of parties do we enjoy? (Formal dinners, backyard BBQs, dance-all-night ragers?)
This helps you think about what fits you as a couple, not just what’s trending on Instagram.
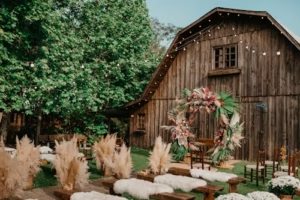
Popular Wedding Styles (Pick One, or Mix a Few!)
You don’t have to fit into a box, but here are some common styles to help get your brain going:
- Classic & Elegant – Black tie, candles, lots of white and gold
- Rustic – Barns, mason jars, wildflowers, wood accents
- Boho – Pampas grass, rugs in the aisle, flowy dresses
- Modern – Clean lines, bold colors, sleek venues
- Romantic – Soft lighting, pastels, floral everything
- Vintage – Retro details, antique touches, old-school charm
- Beachy or Tropical – Palm leaves, ocean views, barefoot vows
- Backyard & Casual – Simple, relaxed, homey and personal, read my blog on Garden weddings here.
You can also blend them! (Modern + romantic? Boho + beachy? Totally works.) Which theme speaks to you both?
Make a Mood Board
You don’t need to be a designer. Just gather things you like:
- Photos from Pinterest or Instagram
- Fabric swatches or color combos
- Pictures of dresses, flowers, tables, lighting, or even cakes
Try creating a board (physical or digital) so you can see it all together. Patterns will pop out—maybe you’re drawn to soft colors, or love moody lighting, or can’t stop saving photos with string lights. Which photos make you smile?
That’s your style talking.
Pick Your Colors
You may also like this blog on neutral wedding colors. Neutral colors never go out of style.
Your wedding colors don’t need to be perfect or matchy-matchy. Just choose 2 to 4 colors you love that work well together. These can guide your flowers, clothes, invites, and more.
Read this blog on spring wedding colors.
Example combos:
- Dusty blue + sage green + ivory
- Terracotta + blush + rust
- Navy + gold + white
- Lavender + gray + silver
Use your mood board to help decide!
What If We Like Different Things?
Totally normal. Try to blend both of your styles. Maybe one of you loves nature and the other loves glam—hello, garden party wedding with gold accents!
You can also divide the wedding into sections, and you can each be in charge of that section. Meaning, if the entertainment is the most important thing to you, then maybe you are in charge of that area of the wedding (with final approval from your partner, of course). If the colors and décor are the most important things to your partner, then they can be in charge of that (with final approval from you, of course). There may be some things that come down to, “yes, I can live with that, or no, I need to veto that choice.”
The key is to make it feel like you two are together. Don’t feel pressured to please everyone else. You are planning the perfect-for-you wedding.
Next Up…
Let’s lock in your wedding date and start looking at venues, because once those are set, everything else starts falling into place.
Read the guide to selecting your wedding venue.
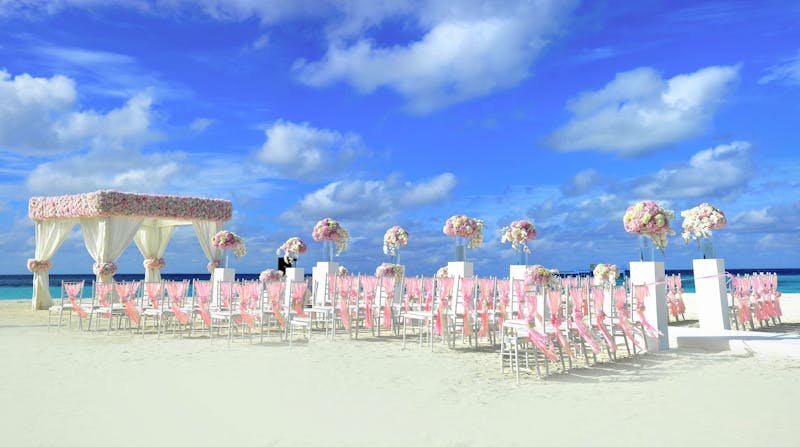
4. Setting the Date and Finding the Right Venue
Once you’ve got your style figured out and a budget in mind, it’s time to set a date and choose a venue. These two decisions will shape pretty much everything else: your guest list, your vendors, and even your decor.
Don’t worry, this part doesn’t have to be overwhelming. Let’s break it down.
Step 1: Think About Seasons First
Start by thinking about what season you want to get married in. Each one has its own vibe:
- Spring – Fresh flowers, garden settings, soft colors. Read this blog on spring wedding colors.
- Summer – Outdoor ceremonies, longer days, warmer nights
- Fall – Cozy colors, rustic charm, cooler weather. Read this blog on fall wedding ideas.
- Winter – Candlelight, dramatic decor, and possible snow! Read this blog on winter wedding cocktails.
You don’t have to pick an exact day yet, just narrow it down to a few months that make sense for your style and your schedule.
Step 2: Check Schedules and Important Dates
Before you lock anything in:
- Look at school calendars (especially if you or guests are teachers/parents/students)
- Avoid major holidays (unless you’re aiming for one on purpose)
- Think about work schedules or travel plans
- Double-check that there are no family conflicts (like another wedding, or graduations, planned surgeries, or babies)
You’ll want to give your guests time to plan, especially if a lot of them are traveling.
Step 3: Set a Budget for the Venue
Remember, the venue and catering together usually take up about half your budget.
Before you start booking tours, decide how much you can afford for the space, food, and drinks combined. That way, you won’t fall in love with a place that’s way out of reach.
Step 4: Make a Venue Wish List
Here are some things to think about when picking a venue:
- Guest size: Can it fit everyone comfortably?
- Style match: Does it fit your vibe (rustic, modern, formal, etc.)?
- Included stuff: Do they include tables, chairs, or decor?
- Rain backup: If it’s outside, do they have a Plan B?
- Restrictions: Any noise rules, curfews, or vendor limits?
- Location: Is it easy for guests to get to? Close to hotels?
- Vibe: Does it have the right vibe? Does the look and the feel seem right?
It helps to tour 2–4 venues before making a final decision. Take notes and ask lots of questions.
Pro Tip: Be Flexible with Dates
If you’re open to a Friday, Sunday, or off-season date, you might save a lot of money. Venues often offer discounts for non-Saturdays or slower months like January, February, or November. If you are at the top of your budget, ask the vendor for cost-saving suggestions. Often, they will be willing to offer sage advice and may steer you in the right direction.
Once You Book the Venue…
Congrats! That means your wedding date is official, and now you can:
- Book other vendors (photographer, DJ, etc.)
- Send out save-the-dates
- Start building your detailed timeline
Next Up…
In the next section, I’ll give you a month-by-month planning timeline, so you know exactly what to do (and when) from now until the big day.
Now that you’ve got a date and a venue, it’s time to map out the rest.
This timeline shows what to focus on each month leading up to your wedding. It’s not meant to stress you out—it’s just a guide to keep you on track. You can adjust it to fit your timeline.
Whether you’re planning in 6 months or 18, the key is to do a little at a time. That way, you don’t get buried in tasks right before your big day. I am not sure who first coined this phrase, but remember “the best way to eat an elephant is one bite at a time.”
12 Months Out (or as soon as you’re engaged)
- Set your budget
- Build a guest list
- Pick a wedding style
- Book your venue (and lock in the date!)
- Hire a wedding planner (if using one)
- Start researching photographers, caterers, bands/DJs, florists, and officiants
9–11 Months Out
- Book your photographer and videographer
- Book your DJ or band
- Book your caterer (if it’s not part of the venue)
- Say yes to the dress (or suit!)
- Set up your wedding website
- Take engagement photos (if you are doing this)
- Choose your wedding party
6–8 Months Out
- Order save-the-dates
- Start shopping for attire
- Book your florist
- Book hair and makeup artists
- Book rentals (if needed, chairs, tents, etc.)
- Start thinking about your honeymoon
If you only have 6 months to plan, read this blog on planning a wedding in 6 months.
4–5 Months Out
- Finalize the guest list
- Send save-the-dates
- Order invitations
- Plan the ceremony details (write your vows, choose readings or music)
- Schedule tastings for food, cake, or drinks
- Start planning decor details and DIY projects
- Book transportation if needed
2–3 Months Out
- Mail invitations
- Buy wedding bands
- Finalize menu and timeline with vendors
- Plan your seating chart
- Order favors and small details
- Book your rehearsal dinner
- Schedule your dress/suit fittings
- Remember to delegate some tasks to your wedding party or family members
1 Month Out
- Get a marriage license
- Confirm all vendor details and payments
- Create a wedding day timeline- in great detail.
- Final attire fitting and pressing
- Check in with the wedding party (do they have everything they need?)
- Write your vows if you haven’t yet
- Print place cards, signs, or programs
- Make sure wedding party members know where they need to be and when they need to be there, and what their responsibilities will be.
1 Week Out
- Pack an emergency kit (bobby pins, Advil, double-stick tape, sewing kit, etc.)
- Confirm headcounts with vendors
- Pick up clothes and accessories
- Pack for your honeymoon
- Relax, breathe, and soak it all in
Read this blog on wedding day emergency kits.
The Day Before
- Rehearsal and rehearsal dinner
- Lay out everything you need for the morning
- Take care of any last-minute issues(yes, set aside time for this-you will be glad you did)
- Go to bed early and drink lots of water!
The Wedding Day
- Eat breakfast
- Take your time getting ready
- Stick to your timeline, but don’t stress
- Let other people handle the little things
- Be present. Soak it in. Have fun.
Next Up…
You’ve got your timeline, so now let’s go deeper into the big vendors—photography, food, flowers, and more.
6. Booking the Big Vendors
Read this blog on how to pick your wedding venue.
Once your venue is locked in, the next big task is booking your main vendors, the people who will bring your day to life.
I like to think of this as building your wedding dream team. These are the folks you’ll work closely with, so you want to find people you trust, who understand your style, and who you enjoy talking to.
Don’t stress about knowing exactly what you want yet. You need to start with the basics and go from there.
Here’s Who to Book First:
These vendors tend to book up fast, sometimes a year or more ahead, so try to lock them in early:
- Photographer
- Videographer (if using one)
- Caterer (unless included with venue)
- DJ or Band
- Officiant
- Planner or Coordinator (if using one)
Once those are taken care of, you can move on to florists, cake baker, rentals, transportation, hair and makeup, and so on.
What to Look for in a Vendor
When I’m checking out vendors, I look for 3 things:
- Their work: Do I like their photos, videos, food, or style?
- Their vibe: Do I feel comfortable talking to them?
- Their reviews: What do past couples say about them?
Always check their website or social media. Most vendors have galleries, pricing info, and testimonials you can scroll through before reaching out.
What to Ask Before You Book
Once you’re ready to reach out, here are some smart questions to ask:
- Are you available on our date?
- What packages or pricing do you offer?
- What’s included? Are there any hidden fees?
- Can we customize your services to fit our style?
- How do you handle contracts, payments, and cancellations?
- Have you worked at our venue before?
- What happens if you’re sick or unavailable at the last minute?
Don’t feel weird about asking questions; it’s your wedding! Good vendors will be happy to walk you through everything. Another good question to ask is, “What else do I need to know that I have not asked yet?”
Red Flags to Watch Out For
- Super slow replies
- Vague answers about pricing
- No contract
- Pushy sales tactics
- Bad reviews or no reviews at all
If something feels off, trust your gut. There are plenty of amazing vendors out there, don’t settle.
Bonus Tip: Keep It All in One Spot
Use a binder, folder, or digital wedding planner to keep track of:
- Contracts
- Contact info
- Payment schedules
- Notes from meetings or calls, including dates
It makes life so much easier when everything’s organized in one place.
7. Making the Guest List
Okay, this is the part where things can get tricky… but it doesn’t have to be. Couples often have trouble navigating this one. This is where you must work with family members and may need to do some negotiating.
Making the guest list is one of the first big decisions you’ll make as a couple. And honestly, it’s also where things can get a little emotional, because money, family, and expectations all come into play.
You may also like this blog that explains the bridal party roles.
So, let’s take a breath and walk through it step by step.
Step 1: Start With a Rough Number
Think about your budget and your venue size.
If your venue holds 100 people, you don’t want to invite 200. And if you’re paying per plate, the guest list = the biggest cost. (Food, drinks, rentals… it adds up fast.)
Start by asking:
“How many people can we afford to invite?”
“How many people do we actually want to invite?”
Then work backwards from there.
Step 2: Make 3 Lists
- A-list – Must-haves (close family, best friends)
- B-list – Nice-to-haves (coworkers, extended family, old friends)
- C-list – People we’re only inviting out of guilt (yep, I said it)
This doesn’t mean you have to use all three, but breaking it up makes things easier when it’s time to cut (or add back later).
Step 3: Set Some Rules (and Stick to Them)
You may also like this blog on Wedding Seating Charts.
To avoid arguments and drama, it helps to set a few ground rules with your partner:
- Are we inviting kids?
- How are we splitting the guest count between families?
These questions will come up. It is best to decide on them early, so you’re not caught off guard later.
Step 4: Keep Track of Everything
Use a spreadsheet, wedding planning app, or even a notebook to track:
- Full names
- Mailing addresses
- RSVP status
- Meal choices, food allergies (if needed)
- Gifts received (for thank you notes later)
It seems extra at first, but trust me, when the RSVPs start rolling in, you’ll be glad it’s all in one place.
Step 5: Expect Some Opinions
Some people may try to weigh in. Parents might want to invite coworkers. Relatives might say, “You have to invite your third cousin’s girlfriend.”
Here’s my rule: If they’re not part of your life, they don’t need to be part of your wedding day.
Stay kind, but firm. This is your day.
One Last Thing: You Can’t Please Everyone
Someone might be upset they didn’t get an invite. Or someone might decline. They may ghost your RSVP.
Let it go. Focus on the people who show up for you, and get excited to celebrate with your people.
8. Planning the Ceremony: Making It Meaningful
The ceremony is the heart of your wedding day. It’s the part where you get married, and I think it’s worth taking a little time to make it feel personal and true to you. This is a great opportunity to add personal touches.
This doesn’t mean it has to be long or fancy. In fact, the best ceremonies I’ve seen were simple, sweet, and 100% authentic to the couple.
Step 1: Decide What Kind of Ceremony You Want
This blog on new twists on old wedding traditions may help with this.
Start with the big picture:
- Religious or non-religious?
- Formal or casual?
- Traditional or modern?
- Indoors or outdoors?
There’s no right answer, just what feels right for you two.
You can include prayers, songs, cultural traditions, or none of the above. Or walk down the aisle with your dad, your mom, both, or no one at all. You may include children or your dog! This is your moment. Make it right for the two of you.
Step 2: Choose an Officiant
Your officiant sets the tone for the whole thing, so pick someone you trust and feel comfortable with.
Options include:
- A religious leader
- A professional officiant
- A friend or family member (they can get legally ordained online)
If you go with someone you know, it’s a good idea to help them write the script or guide them a bit. It doesn’t have to be formal—it just needs to sound like you.
Step 3: Write (or customize) the Script
Your ceremony can include any of these parts:
- Welcome – A short intro from your officiant
- Readings – Poems, quotes, or meaningful passages
- Vows – Traditional or personal (or both!)
- Exchange of rings
- Unity ritual (optional) – Like lighting a candle or a sand ceremony
- The pronouncement – “I now pronounce you…”
If you’re writing your own vows, start early and keep it simple. Speak from the heart. Practice reading them out loud ahead of time.

Step 4: Think Through the Details
Some things to plan:
- Who walks down the aisle (and in what order)?
- What music will you have for the processional and recessional?
- Will you have the wedding party standing up with you?
- Will guests be seated traditionally or mixed?
- Will you do a first look, or save it for the aisle?

Little details like this make a big difference in how the ceremony flows and how comfortable you feel while it’s happening. NOTE-Please do not wait until the night of the rehearsal to decide on all of the above. I see couples do this often, and it makes the rehearsal confusing, chaotic, and last for hours! All of these things should be decided beforehand. The rehearsal is just a time to run through the logistics of the ceremony. Who stands where, and who walks when? Start with where everyone stands during the ceremony, then practice your exit. At that time, you line up as you will before the ceremony, then run through the entire ceremony. Don’t worry, you can run through it twice (and I would recommend doing that)
Step 5: Keep It Comfortable
A few tips I learned:
- Keep the ceremony short if it’s outside (your guests will thank you!)
- Use a microphone, even if you think you won’t need one
- Have tissues and water nearby
- Don’t worry if you cry, laugh, or stumble over your words; honestly, that’s what makes it real
Bottom Line
You don’t need a perfectly polished script or a Pinterest-worthy setup. What people remember most is how the ceremony felt, and how happy you looked standing there.
Up Next…
Now that you’ve said, “I do,” it’s time to plan the party! Let’s talk about the reception: food, music, dancing, and making it fun for everyone.
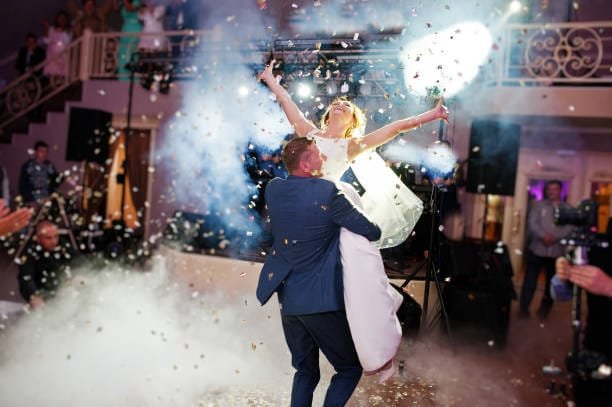
9. Planning the Reception: Food, Music, and Fun
Time to party!
The reception is your big celebration, where you eat, dance, and just enjoy being married. After all the planning, this is your chance to let loose and have fun with your people.
Here’s how I kept things organized while still keeping it fun and low-stress.
Step 1: Think About the Flow
A good reception has a natural rhythm. Here’s the basic order most couples follow (but feel free to switch it up!):
- Cocktail hour
- Guests find their seats
- Grand entrance
- Dinner
- Toasts or speeches
- First dances
- Open dancing
- Cake cutting
- More dancing or a special exit
You don’t have to follow this exactly, just decide what traditions matter to you and build around them. Traditions like the bouquet toss or garter toss are optional.
Step 2: Plan the Food
Food is a big part of the guest experience. You don’t need a five-course meal, but you do want to make sure people are fed and happy.
Read this blog on selecting the Food and Bar for your wedding.
Here are your main options:
- Plated dinner – More formal, served to each guest
- Buffet – Guests serve themselves (or staff serve from stations)
- Family-style – Shared platters passed around each table
- Food trucks or stations – Casual and fun (great for outdoor weddings!)

Read this blog on buffet vs plated dinner for your wedding.
Don’t forget to ask about:
- Special diets (gluten-free, vegetarian, allergies)
- Late-night snacks (hello, pizza or donuts!) Read this blog on late-night wedding snacks.
- What’s included (linens, servers, cleanup)
Step 3: Music and Entertainment
Music sets the mood, whether it’s romantic, high-energy, or totally your vibe.
You’ve got three main choices:
- DJ – Great for keeping the dance floor going and playing lots of different styles
- Live band – More of a show, with a fun energy
- DIY playlist – Budget-friendly, but someone still needs to hit “play” and manage the mood
Talk through your must-play and do-not-play lists. Make sure your DJ or band knows what kind of party you want: low-key, high-energy, or a mix. Yes or no on the Chicken Dance???
Also think about:
- First dance song
- Parent dances (if doing them)
- Reception entrance music
- Last song of the night
Step 4: Add Some Fun Touches
Read this blog on 8 Interactive Wedding Details Your Guests Will Love.
These are the extras that guests always remember:
- Photo booth or selfie station
- Games (like cornhole or a trivia quiz)
- Dance floor props (glow sticks, sunglasses, etc.)
- Guest book alternatives (like a video booth, audio recording, or signed record)
- Signature drinks with fun names
You don’t need a ton of extras, just pick a couple that feel like you.
I think you will like this blog on 24 CUTE wedding ideas.
Pro Tips for a Smooth Reception
- Have a point person (a coordinator, friend, or DJ) to keep the timeline on track
- Feed your vendors (photographer, DJ, planner—they’ll be working hard!)
- Build in buffer time, things will run a little late
- Sneak away for a moment alone after the ceremony. Just the two of you.
Let’s talk about decor, details, and DIY, because the little touches bring your wedding vision to life.
Up Next…
Read this blog on DIY Decor Ideas.DIY Wedding Decorations
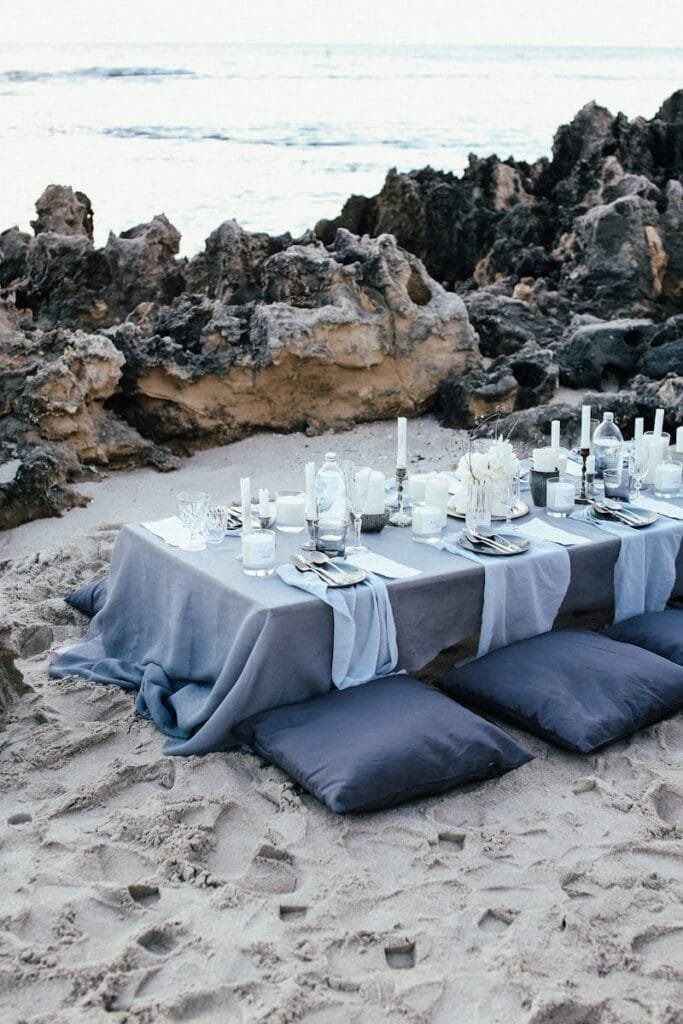
10. Decor, Details, and DIY Ideas
This is the fun part, making your wedding look and feel like you!
Decor and details are where your style shines through. And the good news? It doesn’t have to be expensive or over-the-top to be beautiful. Just keep reminding yourself: the goal is personal, not perfect.
Start With a Vision
Before you buy or DIY anything, think about the overall vibe you’re going for. Ask yourself:
- What colors feel “us”?
- Do we want it to feel romantic, fun, rustic, modern, or casual?
- What kind of atmosphere do we want guests to remember?
You don’t need a theme, just a general direction. This ultimate wedding planning guide will help you wth all of your choices.
Key Decor Areas to Focus On
You don’t need to decorate everything. Focus your energy (and budget) on the spaces that make the biggest impact:
- Entrance – First thing guests see
- Ceremony backdrop – Where your “I do” photos will happen
- Aisle – Simple touches like petals, lanterns, or fabric
- Reception tables – Centerpieces, table numbers, candles
- Sweetheart or head table – Where you’ll sit and be photographed a lot
- Bar or dessert table – Fun signs or displays
- Dance floor – Optional, but can be fun to decorate with lights or a custom sign
Lighting, flowers, and greenery go a long way in making a space feel magical without needing a lot of stuff

DIY or Buy?
You can totally DIY some things, especially if you enjoy crafting. But don’t take on too much. Stick to projects that are:
- Easy to finish ahead of time
- Not messy or stressful, the week of the wedding
- Actually, cheaper than buying
Some easy and fun DIYs:
- Signs (welcome sign, bar menu, unplugged ceremony sign). Read this blog on 13 creative wedding signs.
- Table numbers
- Seating chart display
- Ceremony programs or menus
- Guest favors (like homemade treats or seed packets)
- Personalized drink stirrers, tags, or labels
- Custom playlists for cocktail hour or dinner
If you’re not crafty, Etsy is your friend. Tons of cute, affordable details that still feel personal.
Don’t Forget the Little Touches
It’s the small things that often make people smile, like:
- A photo display of your relationship
- A tribute table for loved ones who’ve passed
- Funny or sweet signage (“Trust me, you can dance — Vodka”)
- Cute napkins, stirrers, or cups with your initials
- A pet cameo in your cake topper or signage
You don’t have to do all the cute things, just pick the ones that make you say, “Yes, that feels like us.” Read my blog on CUTE wedding ideas HERE.
Budget-Saving Tip:
Reuse your decor!
Your ceremony flowers can become reception centerpieces. Bridesmaid bouquets can decorate the cake table. That gorgeous welcome sign? Move it to the reception entrance.
Up Next…
Now let’s talk about timelines and logistics—the behind-the-scenes stuff that keeps your day running smoothly and stress-free.
11. Timelines and Logistics: Keeping It All on Track
Let’s be honest, this is the part most couples want to skip. But I promise, a little planning here goes a long way. The goal isn’t to create a minute-by-minute schedule that stresses you out. It’s to make sure everything flows smoothly so you can actually enjoy your day.
Here’s how I broke it down, so it didn’t feel overwhelming.
Start With the Big Picture
Ask yourself:
- What time do we want the ceremony to start?
- Do we want a first look or wait until the aisle?
- How long do we want the reception to last?
- Are we having a getting-ready photoshoot?
- Do we need time for a room flip (if ceremony and reception are in the same space)?
Once you know the answers to those, you can start filling in the blanks.
Build Your Wedding Day Timeline
Here’s a super simple example of how a wedding day might flow:
9:00 am – Hair and makeup start
12:30 pm – Photographer arrives
1:30 pm – Get dressed
2:00 pm – First look + portraits
3:30 pm – Wedding party photos
4:30 pm – Guests arrive
5:00 pm – Ceremony
5:30 pm – Cocktail hour
6:30 pm – Dinner + toasts
8:00 pm – Dancing
9:00 pm – Cake cutting
10:30 pm – Last dance + send-off

Download this timeline to keep.
Your day might look different, and that’s okay. Just make sure you build in buffer time so you’re not rushing. Pro Tip: Make sure you eat dinner. Tell your caterer you need to make this a priority. Trust me, it is important.
Who’s Doing What? (AKA the Logistics)
You shouldn’t be the one directing traffic on your wedding day. Make a list of who is handling what. Here’s what to think through:
- Who’s setting up the decor?
- Who’s bringing the flowers?
- Who’s cueing the music for the ceremony?
- Who’s lighting candles or handing out programs?
- Who’s cleaning up at the end of the night?
You can ask friends and family to help or hire a day-of coordinator (worth every penny if it fits your budget).
Vendor Timeline
It’s also smart to send each vendor a simple timeline with:
- Arrival time
- Start time
- Where to go when they arrive
- Contact info for your point person (not you!)
Photographers especially need a detailed timeline, so they know what’s happening and when.
The Emergency Kit
Read this blog on wedding day must-haves.
Pack a little kit with things like:
- Safety pins
- Tissues
- Breath mints
- Bandaids
- Pain reliever
- Extra earring backs
- Mini sewing kit
- Snacks and water
It’s one of those “hope you don’t need it, but so glad it’s there” things.
My Biggest Advice?
Plan ahead so you can be present.
Once the big day arrives, let go. The schedule might shift a little, and that’s okay. You’ve done the work. Now it’s time to soak it all in.
Up Next…
Let’s wrap things up with what happens after the big day—thank-yous, returns, photo delivery, and how to come back down to earth after one of the best days of your life.
12. After the Wedding: Thank-Yous, Returns, and Real Life
You did it! You’re officially married.
Now take a breath, eat the leftover cake, and soak up all the love.
The wedding might be over, but there are still a few things to wrap up. Don’t worry—this part doesn’t have to be a drag. I made a short list and chipped away at it, one thing at a time.
Step 1: Say Thank You
Everyone tells you to write thank-you notes, and they’re right. People spent time, money, and energy to celebrate with you. A quick note goes a long way.
Here’s how I made it easy:
- Keep a list of who gave what (your gift tracker from earlier comes in handy!)
- Set a goal, like writing 3–5 notes a night while watching TV
- Keep your message short but personal
Example:
Dear Aunt Linda,
Thank you so much for the beautiful serving set, and for being at the wedding! We loved seeing you and can’t wait to use your gift at future holidays.
Done.
Step 2: Handle Returns and Leftovers
If you ended up with doubles or gifts that didn’t quite fit your style, it’s totally fine to return or exchange them. Just do it within the return window (usually 30–90 days).
You may also have some leftover stuff like:
- Decor items
- Unused favors
- Leftover alcohol or snacks
- DIY items you don’t need anymore
What to do with them:
- Sell or donate them (check Facebook groups or wedding resale sites)
- Offer items to friends getting married
- Box up a few favorites as keepsakes
Step 3: Get Your Photos and Video
Your photographer and videographer will usually send a sneak peek within a few weeks, and the full gallery a little later (ask ahead about their timeline).
When they arrive:
- Set aside a night to look through them together, just the two of you
- Share your favorites with family or on social media (if you want to!)
- Order prints or albums, don’t let those amazing pics just sit in your inbox
Pro tip: Create a shared folder or backup on the cloud so they’re safe forever.
Step 4: Name Change or Paperwork (If You’re Doing That)
If you’re planning to change your name, there are a few steps:
- Get multiple certified copies of your marriage license
- Update your Social Security card first
- Then tackle your license, passport, bank, work, etc.
There are services that can help with this if you want to make it easier.
Step 5: Enjoy the Pause
Wedding planning can take up a lot of brain space. Once it’s over, you might feel a little… weird? That’s normal.
Here’s what helped me:
- Plan a “just us” day after the wedding (even if it’s just a walk and takeout)
- Take time to talk about your favorite parts of the day
- Keep celebrating your relationship, marriage isn’t the end of the fun, it’s the beginning
Final Thoughts
You made it through the whole wedding planning journey.
You chose what mattered, you made it your own, and you (hopefully) had a lot of fun along the way.
Just remember: it’s not about one perfect day. It’s about building a life together, one step at a time.
And if you ever feel stuck, just go back to where you started, what matters most to both of you.
You’ve got this.
Let’s Wrap It Up
Planning your wedding doesn’t have to be overwhelming. When you break it down step by step, and give yourself permission to have fun along the way, it becomes something you’ll actually enjoy.
Just start where you are. Take it one decision at a time. And remember: this day is about you two and the life you’re building together. That’s what really matters.
If this guide helped you, I’d love to hear about it! Share your favorite part of the planning process in the comments—or tag me on Instagram so I can cheer you on.
You’ve got this. And I’ve got your back.
Follow me on Pinterest for more great wedding planning advice.
